In this post, we are going to share with you two handy and easy methods in setting up a client device using WPS WiFi Protected Setup method. You can make use either of the physical buttons that your Linksys WiFi extender has or you can log in to the web-based setup page for Linksys extender login and for the setup of your Linksys device and select one of the three options for the configuration of WPS.
1. WiFi Protected Setup (WPS WiFi) button
2. Web-based WPS button
A WiFi Protected Setup Button
B Using the WPS PIN
C Using the client’s PIN
NOTE: The WiFi Protected Setup (WiFi WPS) configures only one device at a time. The networking/ internet device you wish to connect using WiFi Protected Setup must support the WPS feature. Moreover, for a verification check your Linksys device’s documentation.
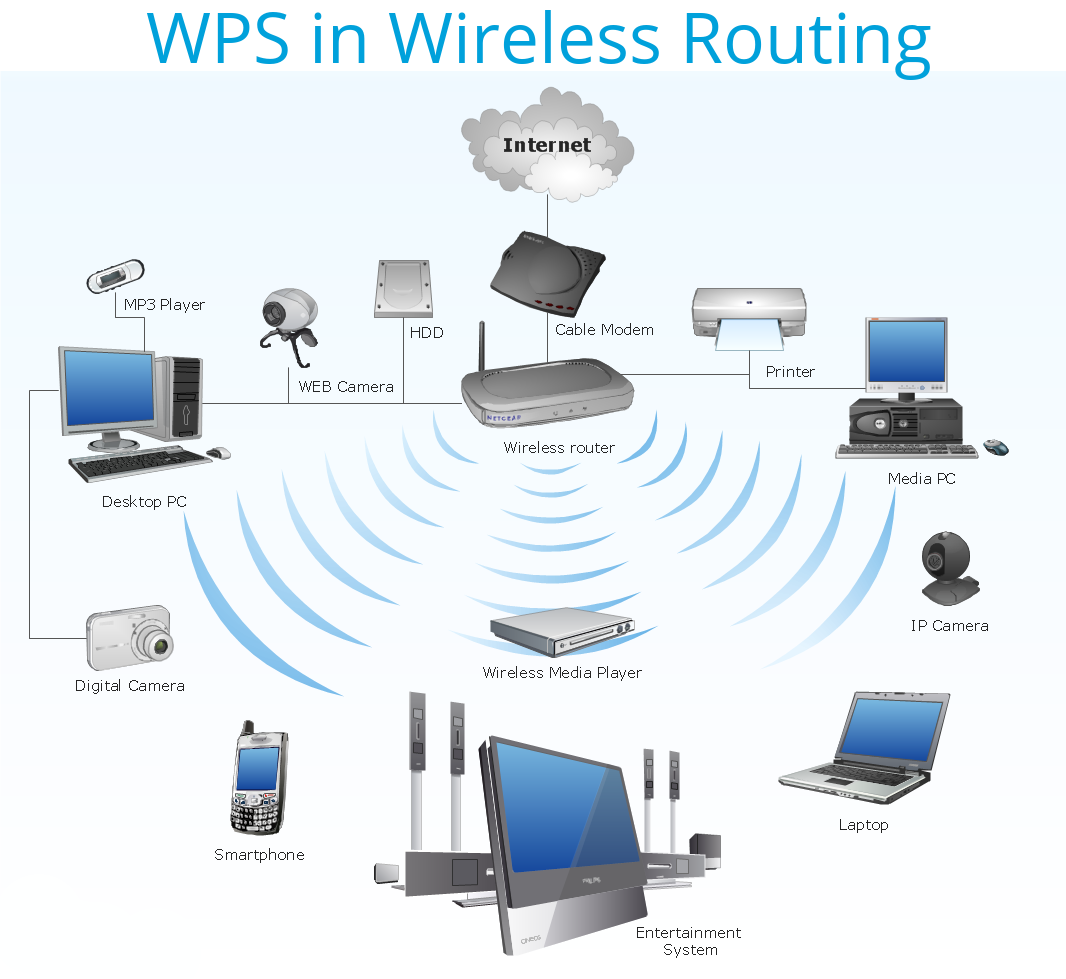
If your existing WiFi router has the WPS feature, then what you are going to do is to push the button and then press the WPS Wife button at the side panel of your range extender after a couple of minutes.
QUICK TIP: If the process of Linksys WiFi extender setup hasn’t be done properly, then pressing and holding the WPS button will configure the Linksys range extender to pair with an existing wireless router physically and properly. However, if your Linksys device is already configured, pressing the WiFi WPS button will configure and install the range extender to pair with wireless clients like wireless laptops, computers or any internet device that supports WPS.
First of all, access the Linksys range extender login page and click on Wireless then on WiFi WPS. After that, locate and hit the WPS button on your client device to start with the WPS process. To learn how to access the web-based setup page of your Linksys WiFi range extender, dial a toll-free number 1-844-726-2726 and coordinate with our certified tech support team.
Once you are onto the Linksys extender setup page (web-based), click on WPS that is situated under Wireless instead. Once done, hit on “Enabled” for WPS.
2. B Using the WPS PIN
If your client device consists of a WPS PIN, then you are supposed to enter that number in the range extender’s web-based setup page in the second field. Once done, click the Register button.
Here, we would like to insist, keep calm and have patience. At any point, if you think that you need assistance, then don’t forget that we are sitting just beside you.
3. C Using the router’s PIN
Moreover, if the client device asks for your existing WiFi router’s PIN, then you are supposed to enter the number shown in the third field into your smart WiFi-enabled (client) device.
4. WiFi Protected Setup Light Activity
As soon as the WiFi Protected Setup (WPS Wife) process is active, the LED (power) light flashes slowly every 2-3 seconds for 2-3 minutes. On the other hand, when the WiFi Protected Setup (WPS) is successful, the light stays lit (stable) continuously.
If there you experience an error, unfortunately, the light flashes sporadically for a couple of minutes. So, you have to wait until the light stops flashing prior to trying again.
How to set up a Linksys Range Extender via WiFi-Protected Setup
Installing and Configuring the Linksys range extender with WPS (WiFi Protected Setup)
Firstly, carefully and gently press and hold the WPS button on your Linksys WiFi range extender for a couple of seconds. The WPS power LED on the front panel of your device will blink.
Now, within a couple of minutes, press and hold the WPS button on your main wireless router as well.
If your existing WiFi router supports the 5GHz band, then you are supposed to repeat steps 1 and 2 to connect your smart Linksys device to the 5GHz band.
For further assistance, you can drop your queries below and our highly-qualified professionals will get back to you with a relevant solution to your problem instantly.
Originally posted 2020-04-02 11:48:48.
